ioBroker (Tasmota + MQTT + VIS)
This guide explains how to integrate a Tasmota-based IoT device with ioBroker using the Mosquitto MQTT broker and visualize live data using the VIS adapter.
Step 1: Setup ioBroker
-
Open your browser and go to:
http://<ip>:8081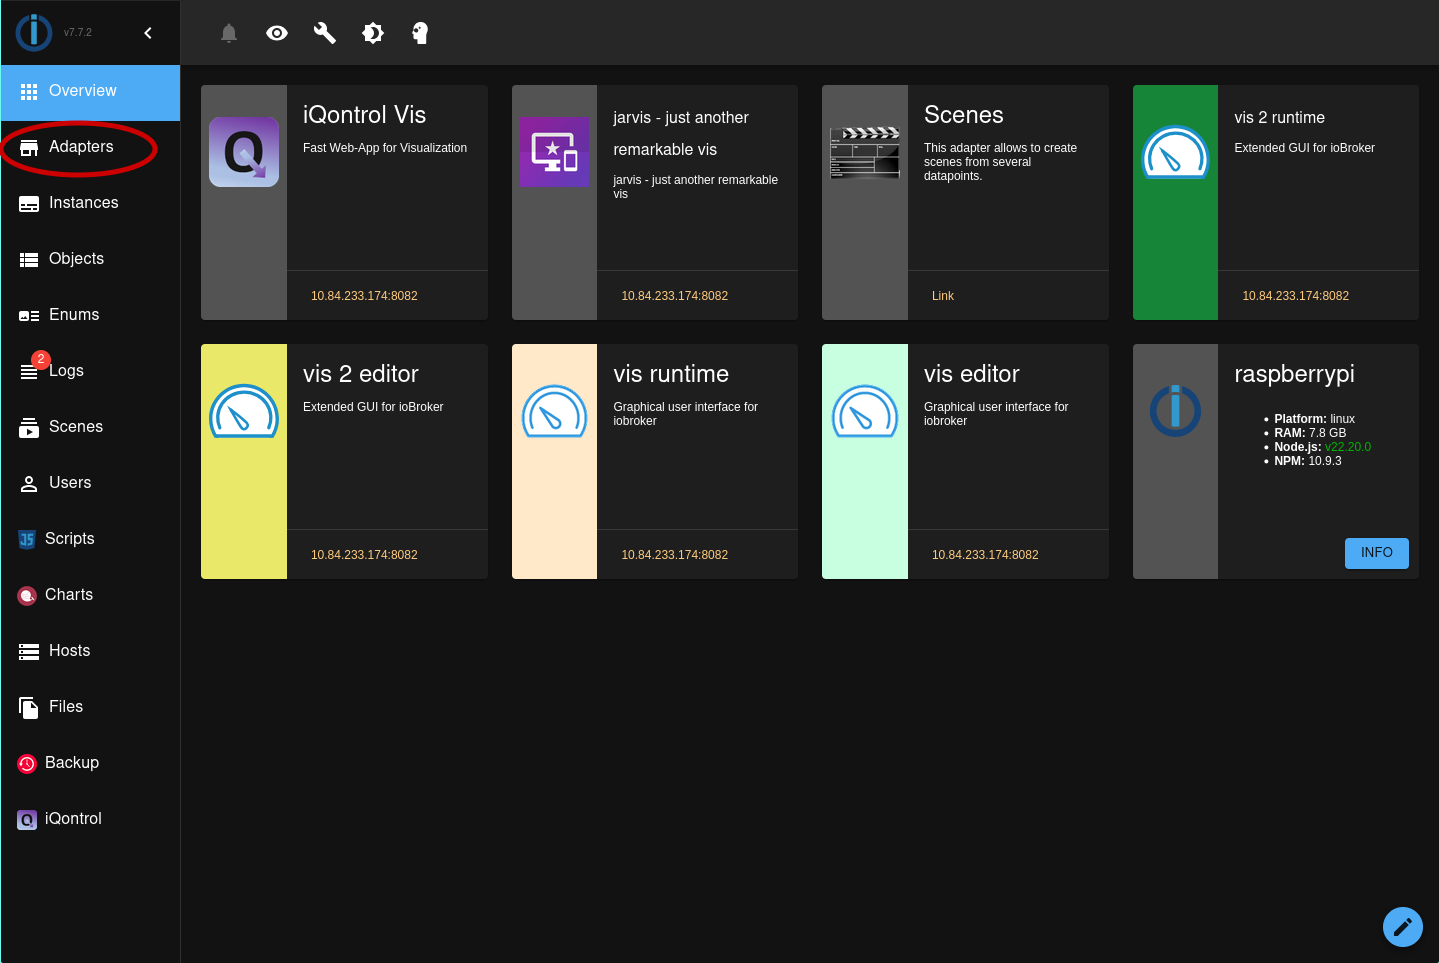
-
Go to the Adapters tab.
-
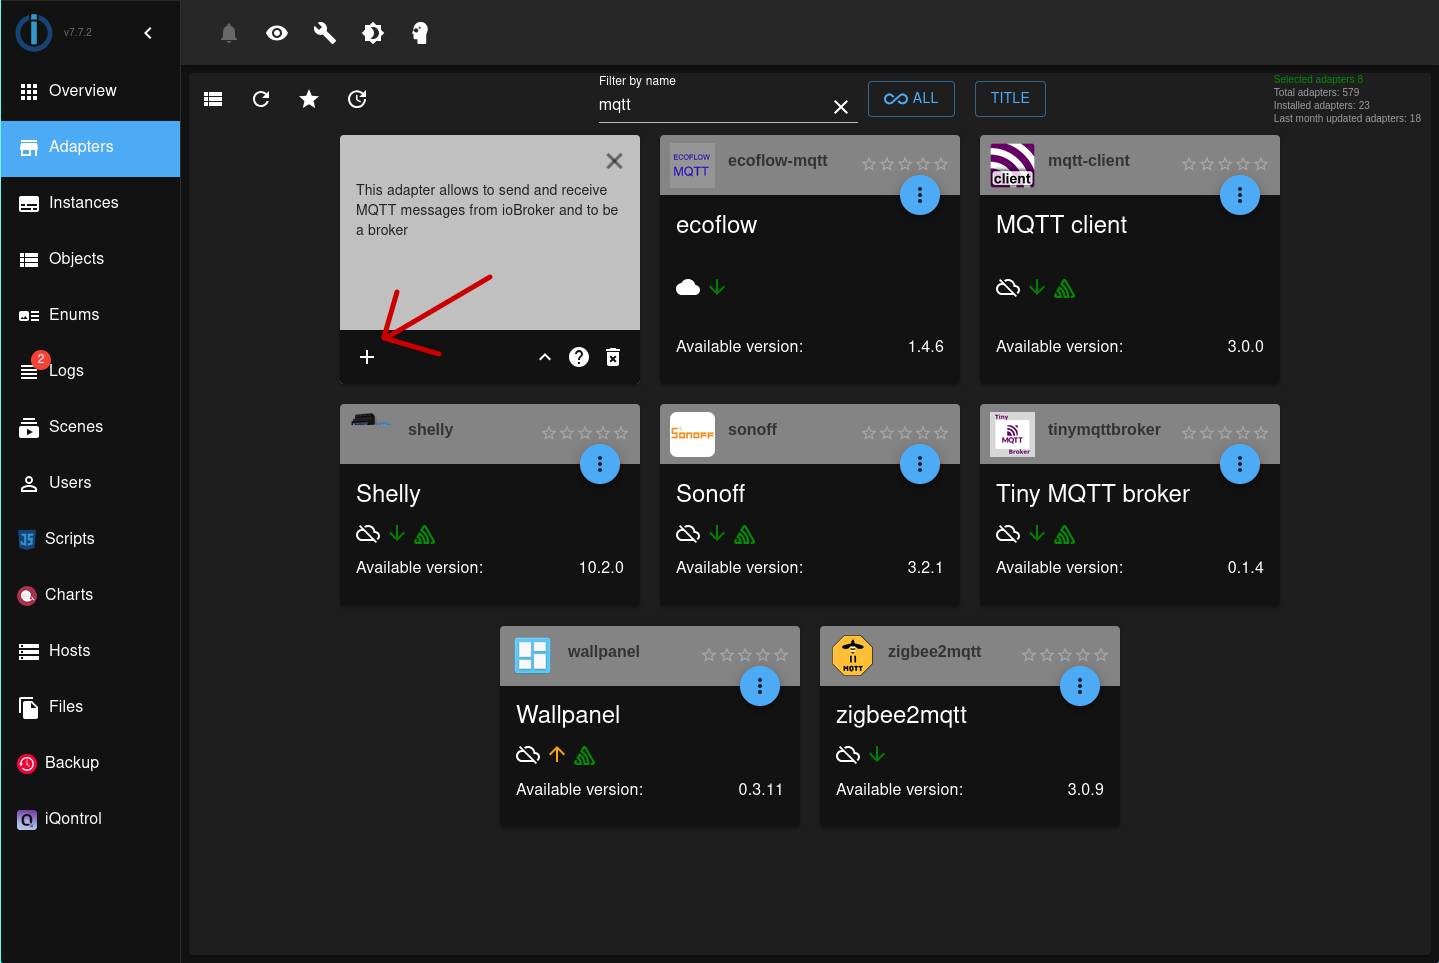
Search and install the Mosquitto MQTT adapter.

-
Create an instance of the MQTT adapter.
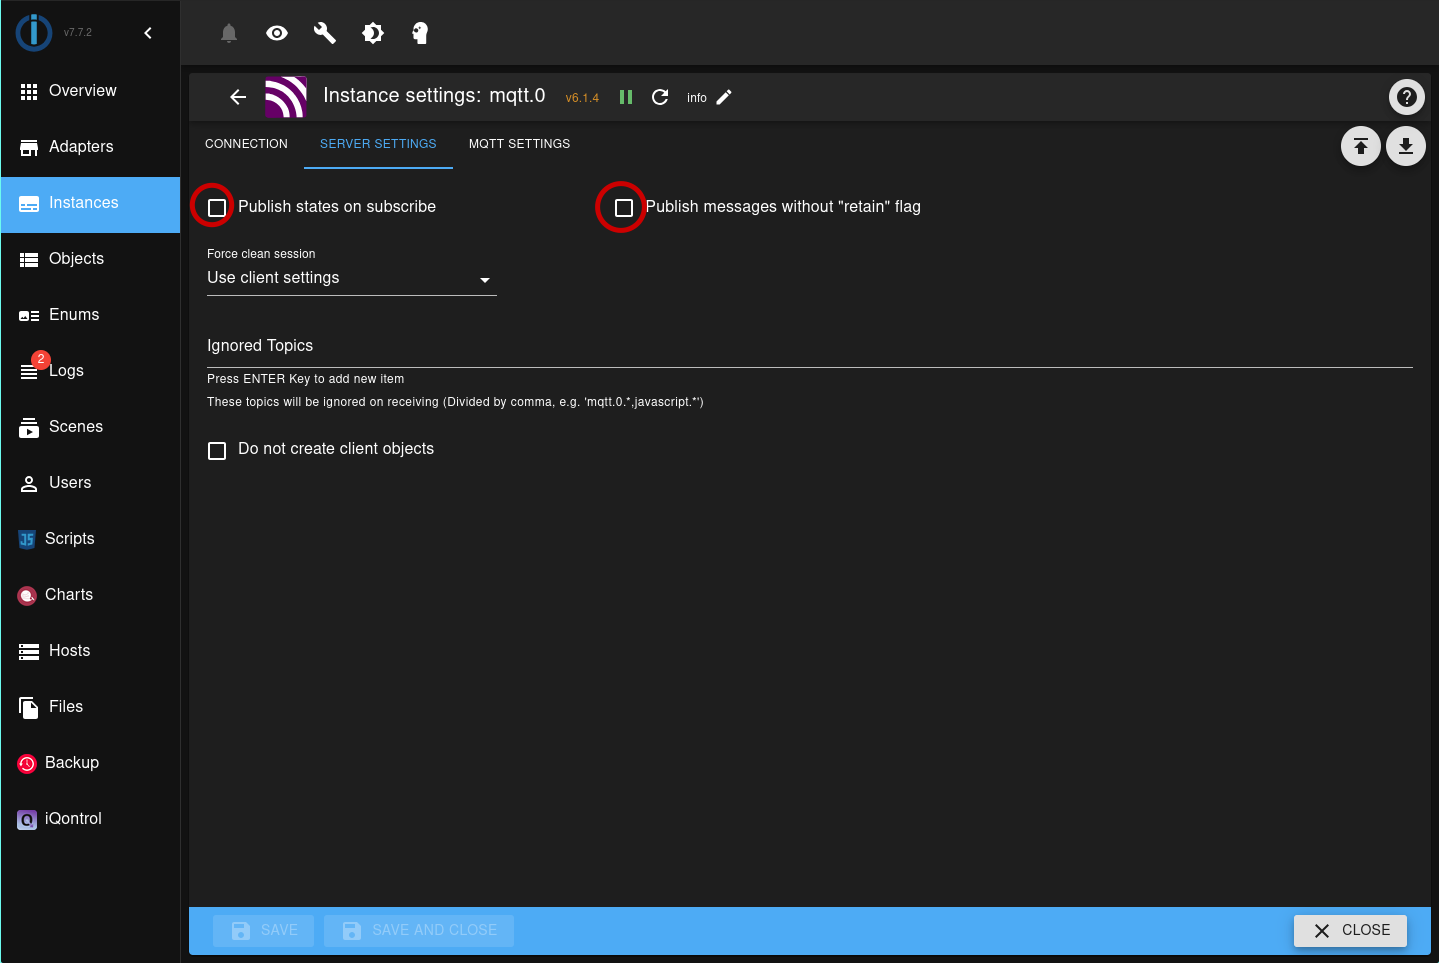
Step 2: Configure Mosquitto Broker
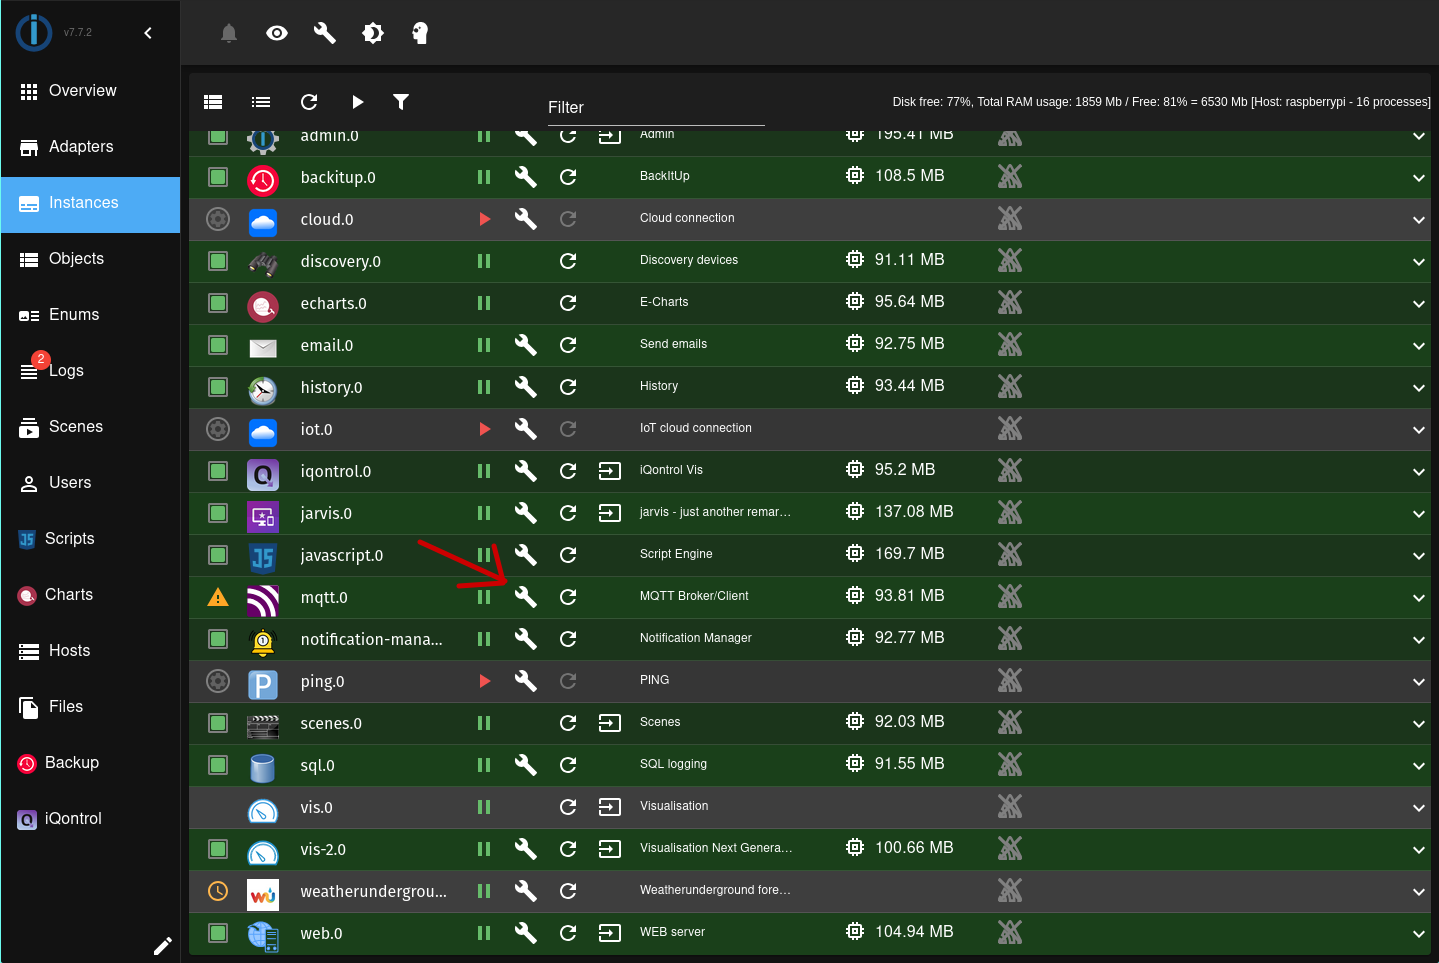
- Go to Instances tab.
- Click the wrench icon on the MQTT adapter instance.
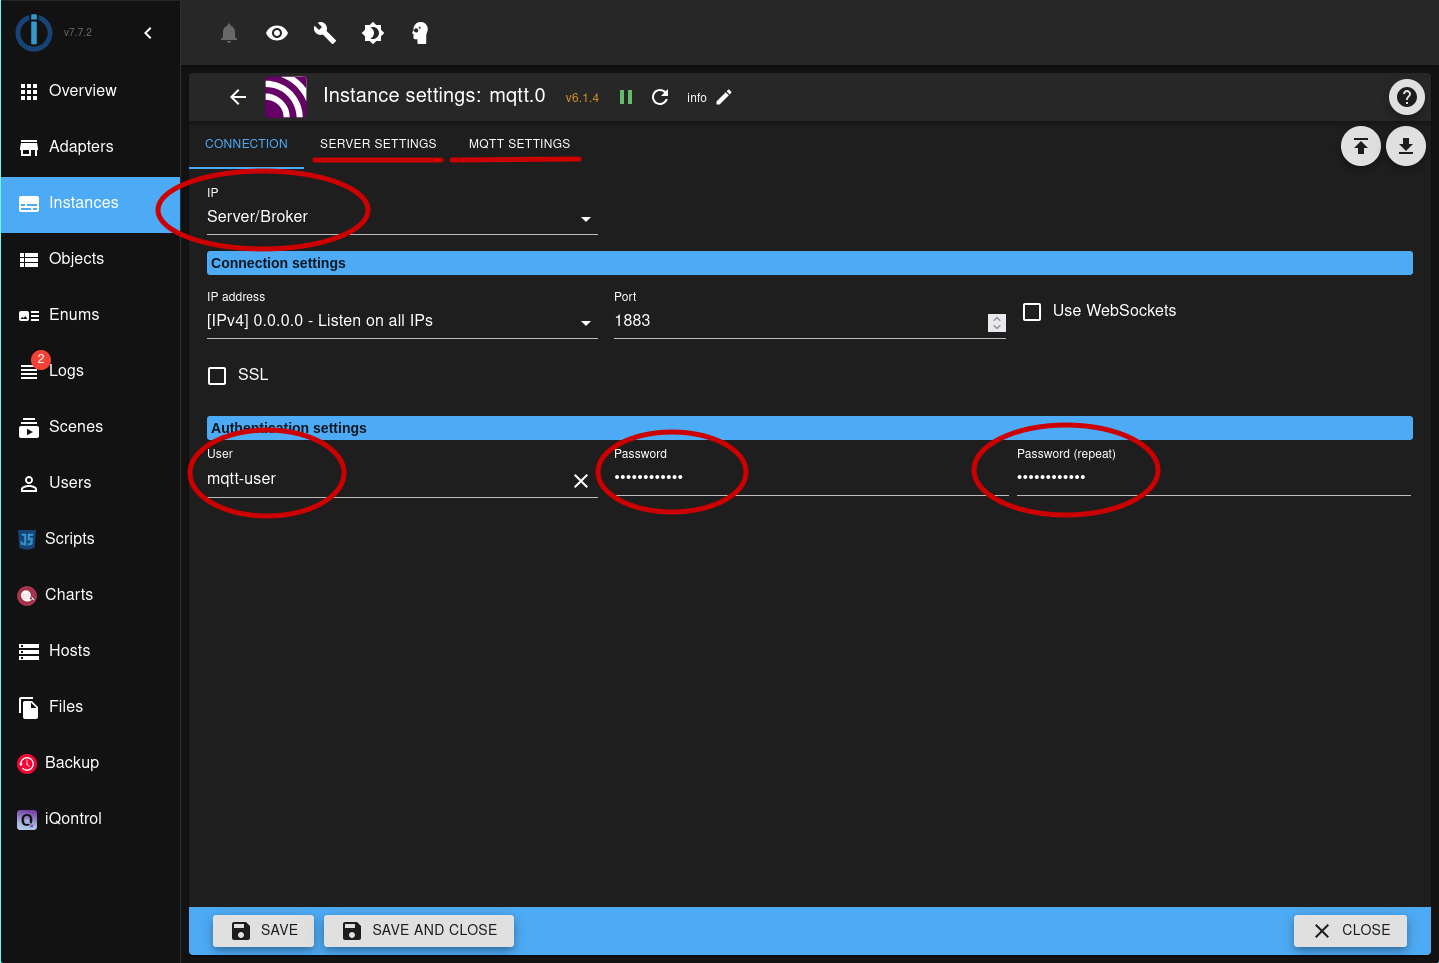
- Under Broker Configuration:
- Set the role as Server/Broker.
- Set up a username and password.
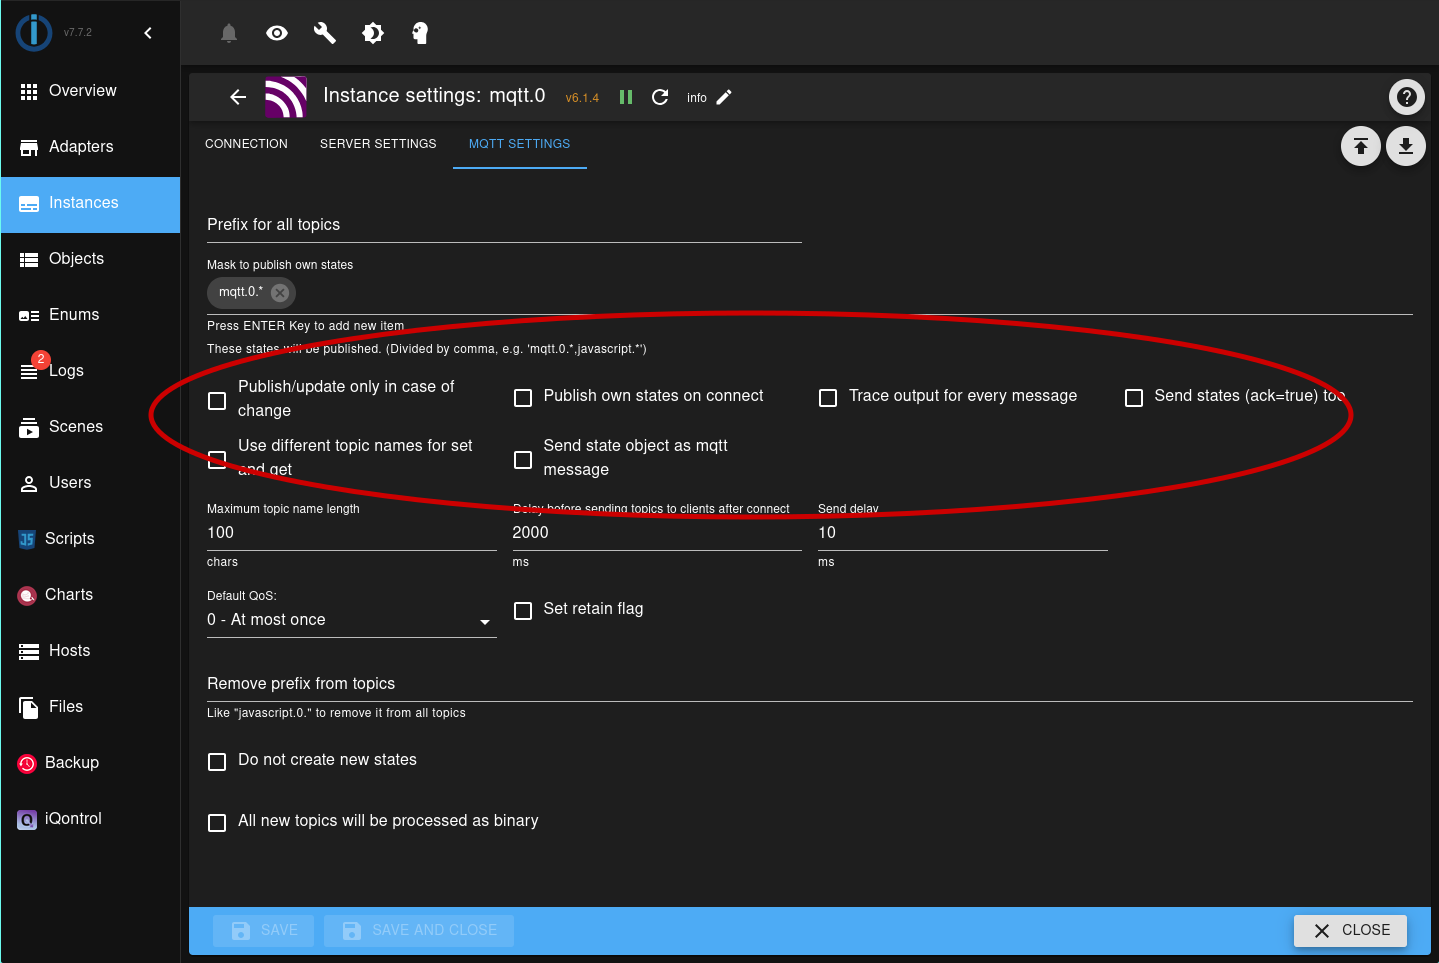
- In the Server Settings and MQTT Settings, uncheck all options.
- Click Save and Start the instance.
Step 3: Configure the Tasmota Device
- Open the Tasmota web interface of your device.
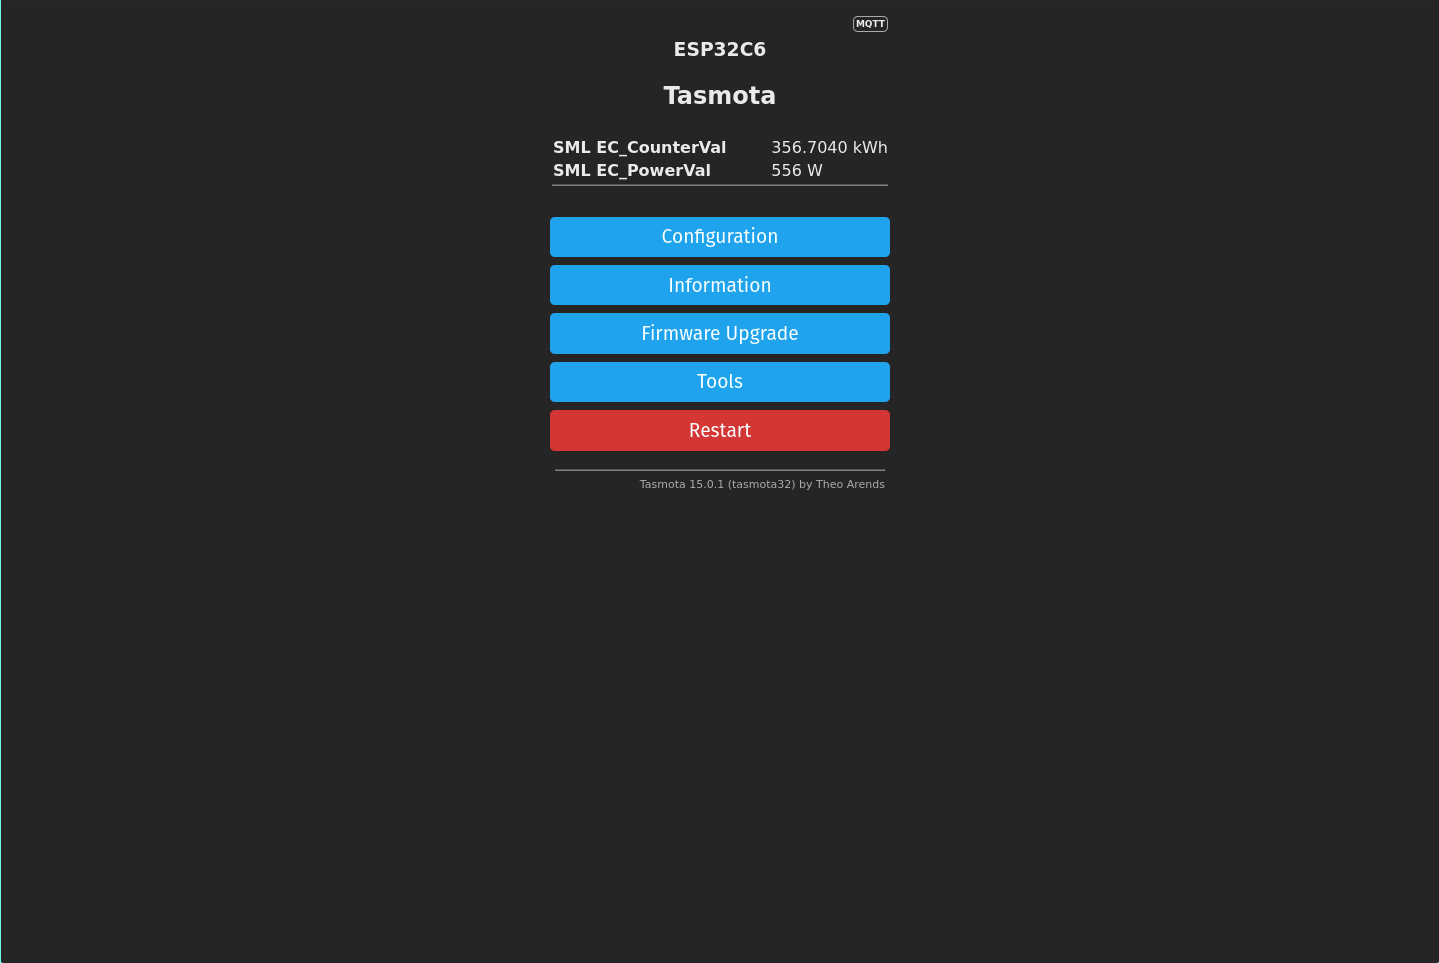
- Go to Configuration → MQTT.
- Set the following values:
- Host:
<ioBroker IP> - Port:
1883 - Username / Password: (same as Mosquitto credentials)
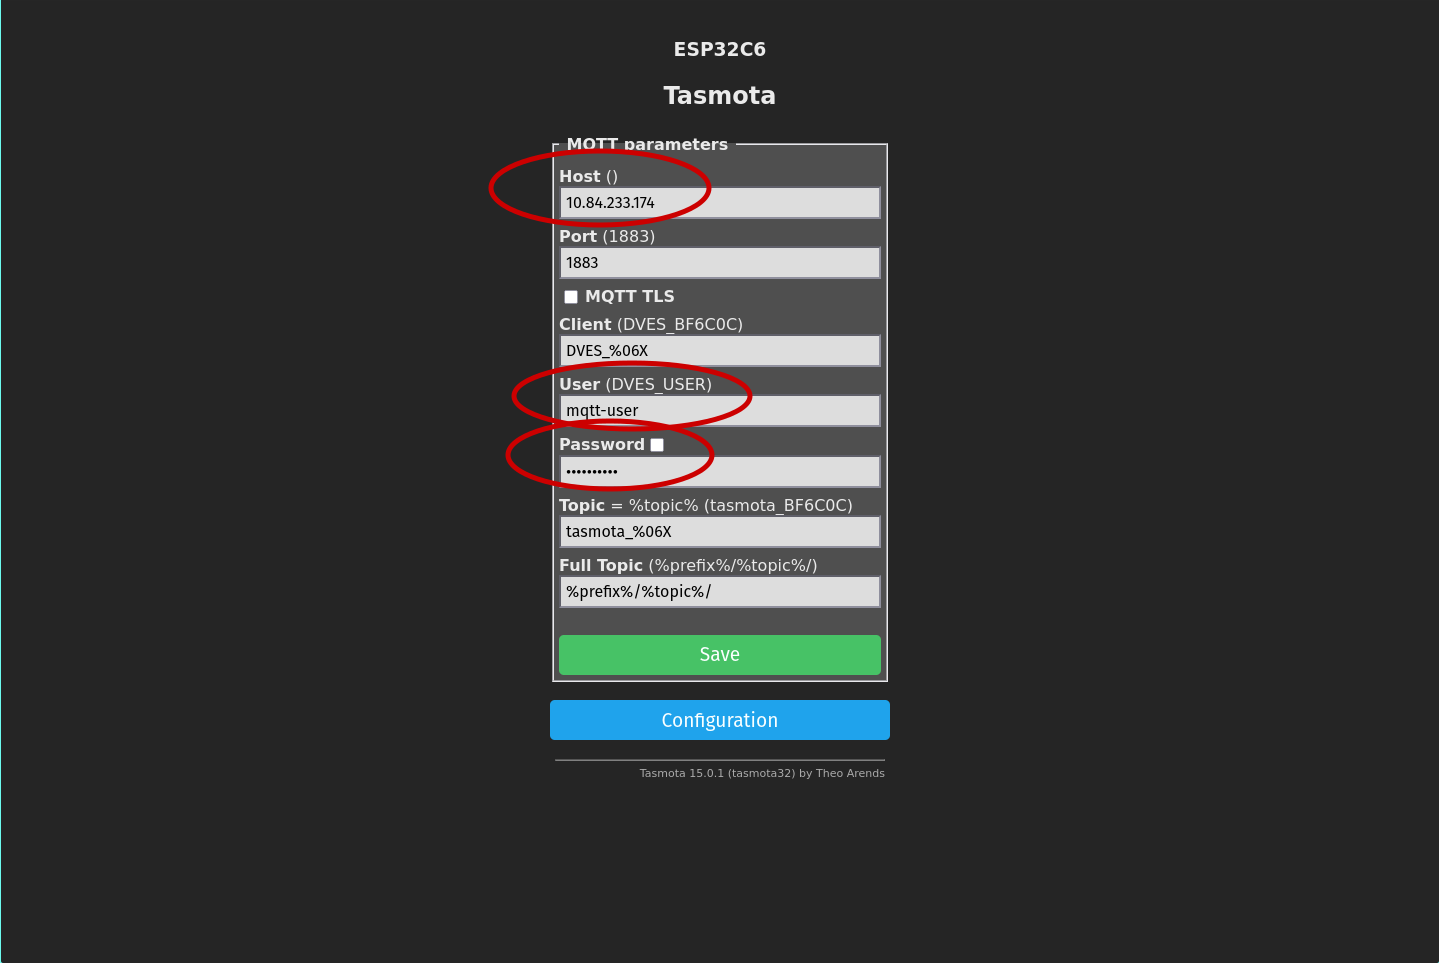
- Host:
- Leave all other fields as default.
- Save and restart the device.
The Mosquitto broker will auto-discover the Tasmota device.
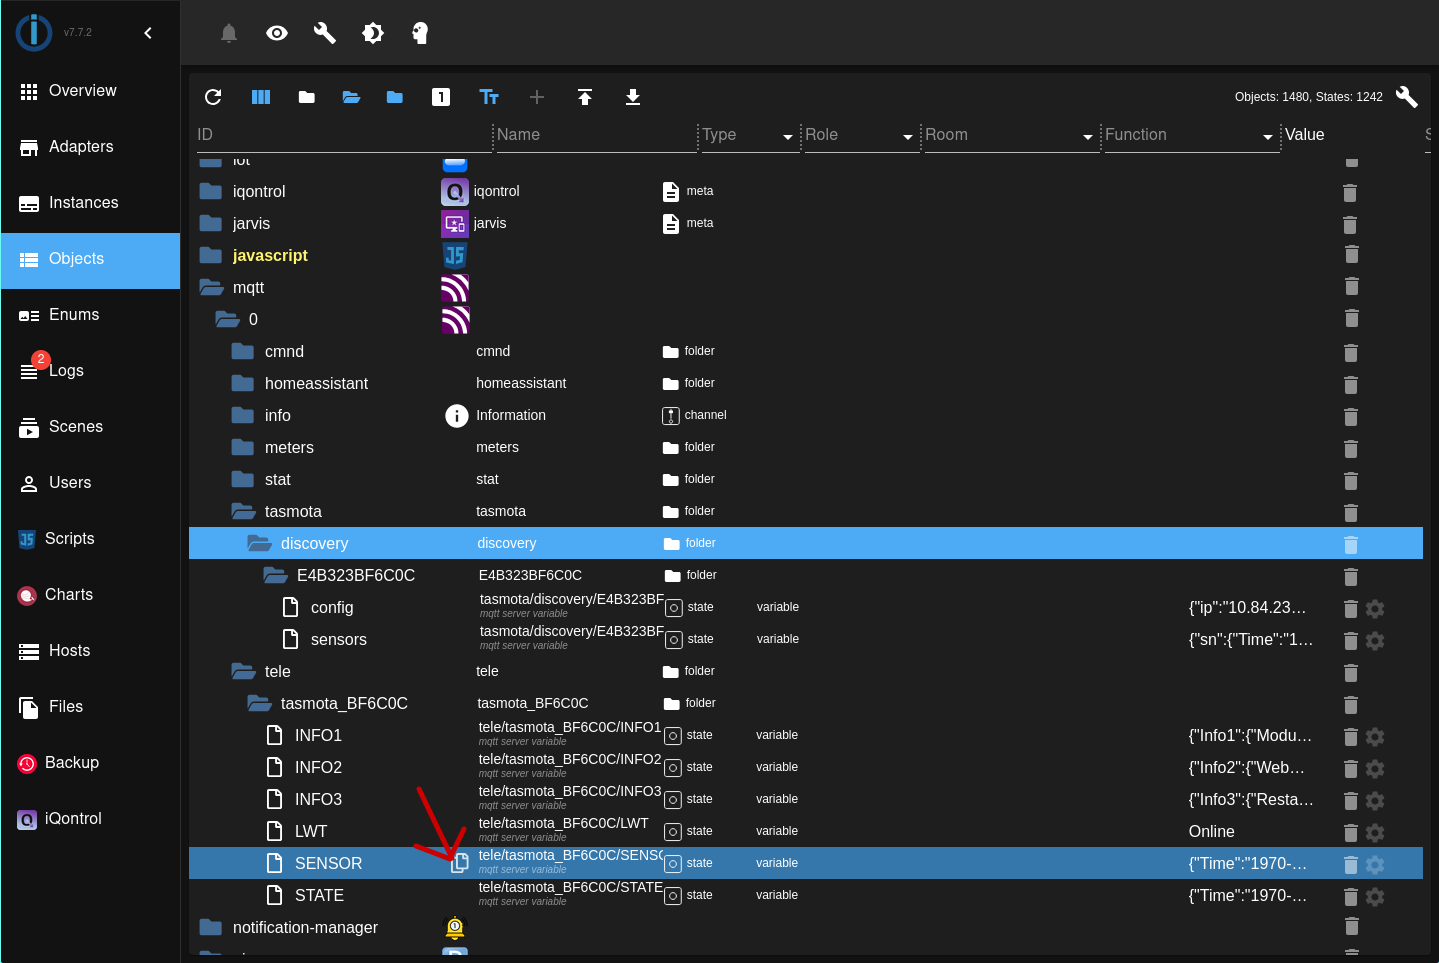
Step 4: Verify Device Data in ioBroker
-
In ioBroker , go to Objects tab.
-
Navigate to:
mqtt.0.tele.tasmota_XXXXXX.SENSOR -
Copy this state path for use in the script.
Step 5: Create JavaScript for Data Extraction
- Go to Scripts tab in ioBroker.
- Create a new JavaScript file.
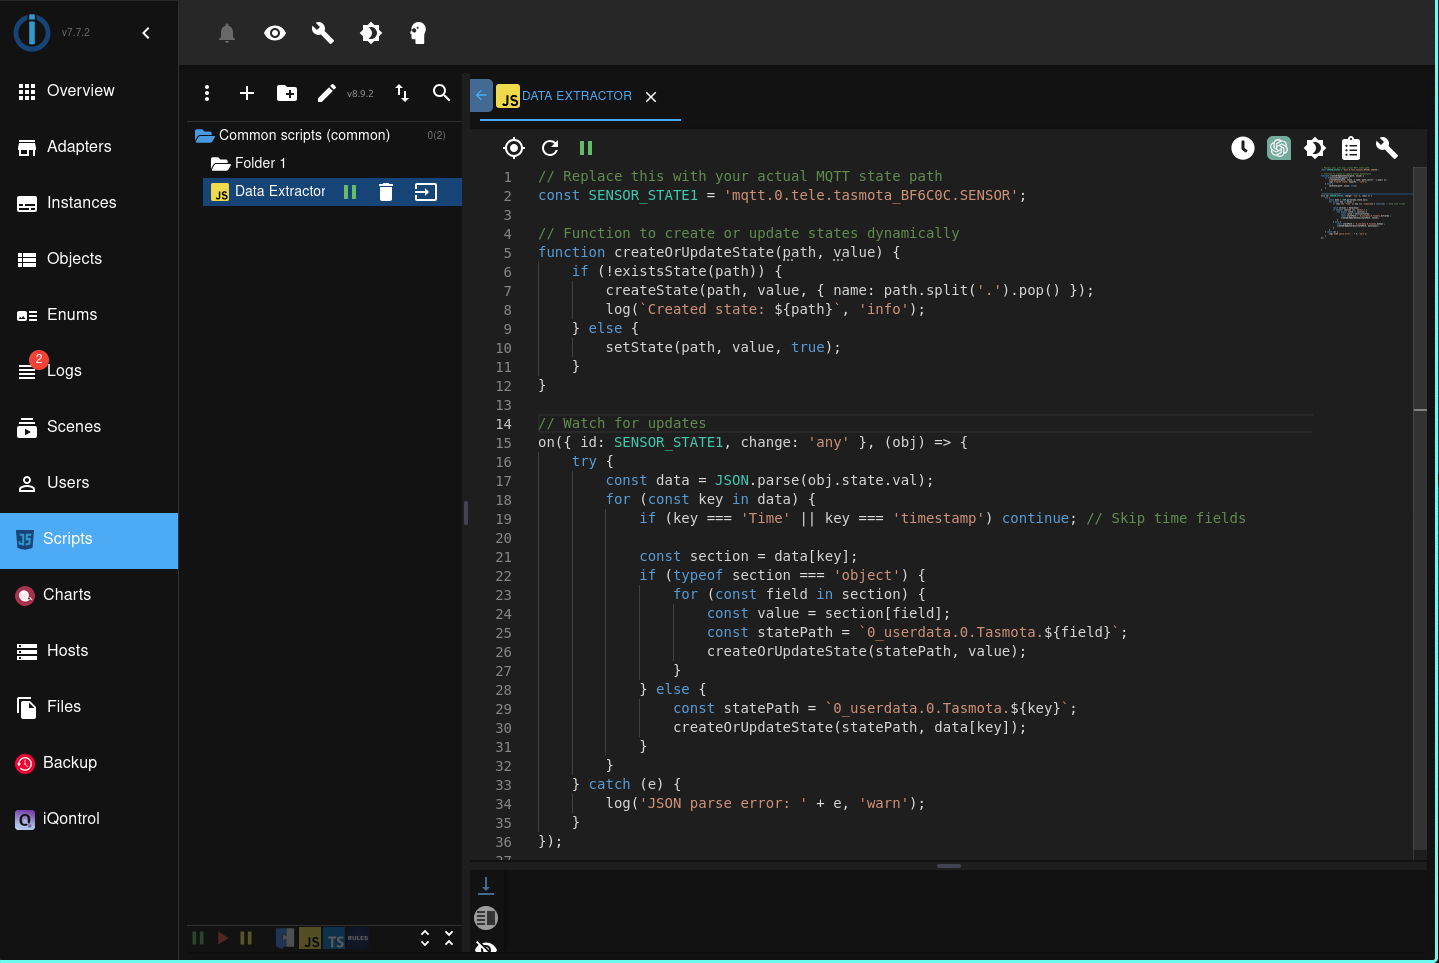
- Paste the following code and start the script:
// Replace this with your actual MQTT state path
const SENSOR_STATE1 = "mqtt.0.tele.tasmota_XXXXXX.SENSOR";

// Function to create or update states dynamically
function createOrUpdateState(path, value) {
  if (!existsState(path)) {
    createState(path, value, { name: path.split(".").pop() });
    log(`Created state: ${path}`, "info");
  } else {
    setState(path, value, true);
  }
}

// Watch for updates
on({ id: SENSOR_STATE1, change: "any" }, (obj) => {
  try {
    const data = JSON.parse(obj.state.val);
    for (const key in data) {
      if (key === "Time" || key === "timestamp") continue; // Skip time fields

      const section = data[key];
      if (typeof section === "object") {
        for (const field in section) {
          const value = section[field];
          const statePath = `0_userdata.0.Tasmota.${field}`;
          createOrUpdateState(statePath, value);
        }
      } else {
        const statePath = `0_userdata.0.Tasmota.${key}`;
        createOrUpdateState(statePath, data[key]);
      }
    }
  } catch (e) {
    log("JSON parse error: " + e, "warn");
  }
});
Step 6: Setup Visualization (VIS)
-
Go to Adapters → install the VIS (Visualization) adapter.
-
Open VIS Editor at:
http://<ip>:8082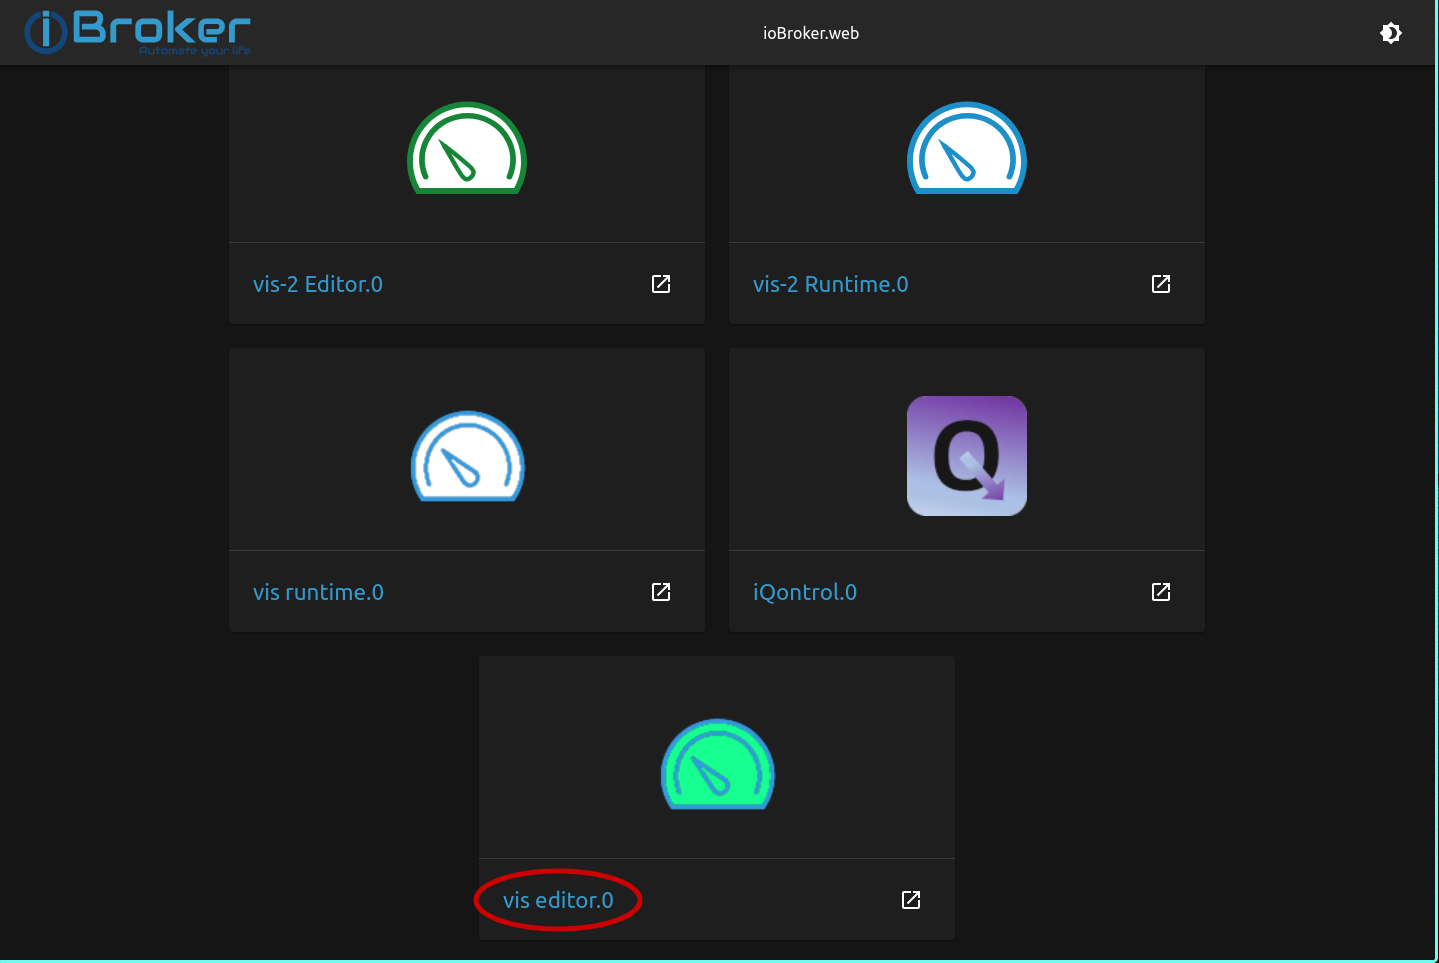
-
Choose VIS Editor 0.
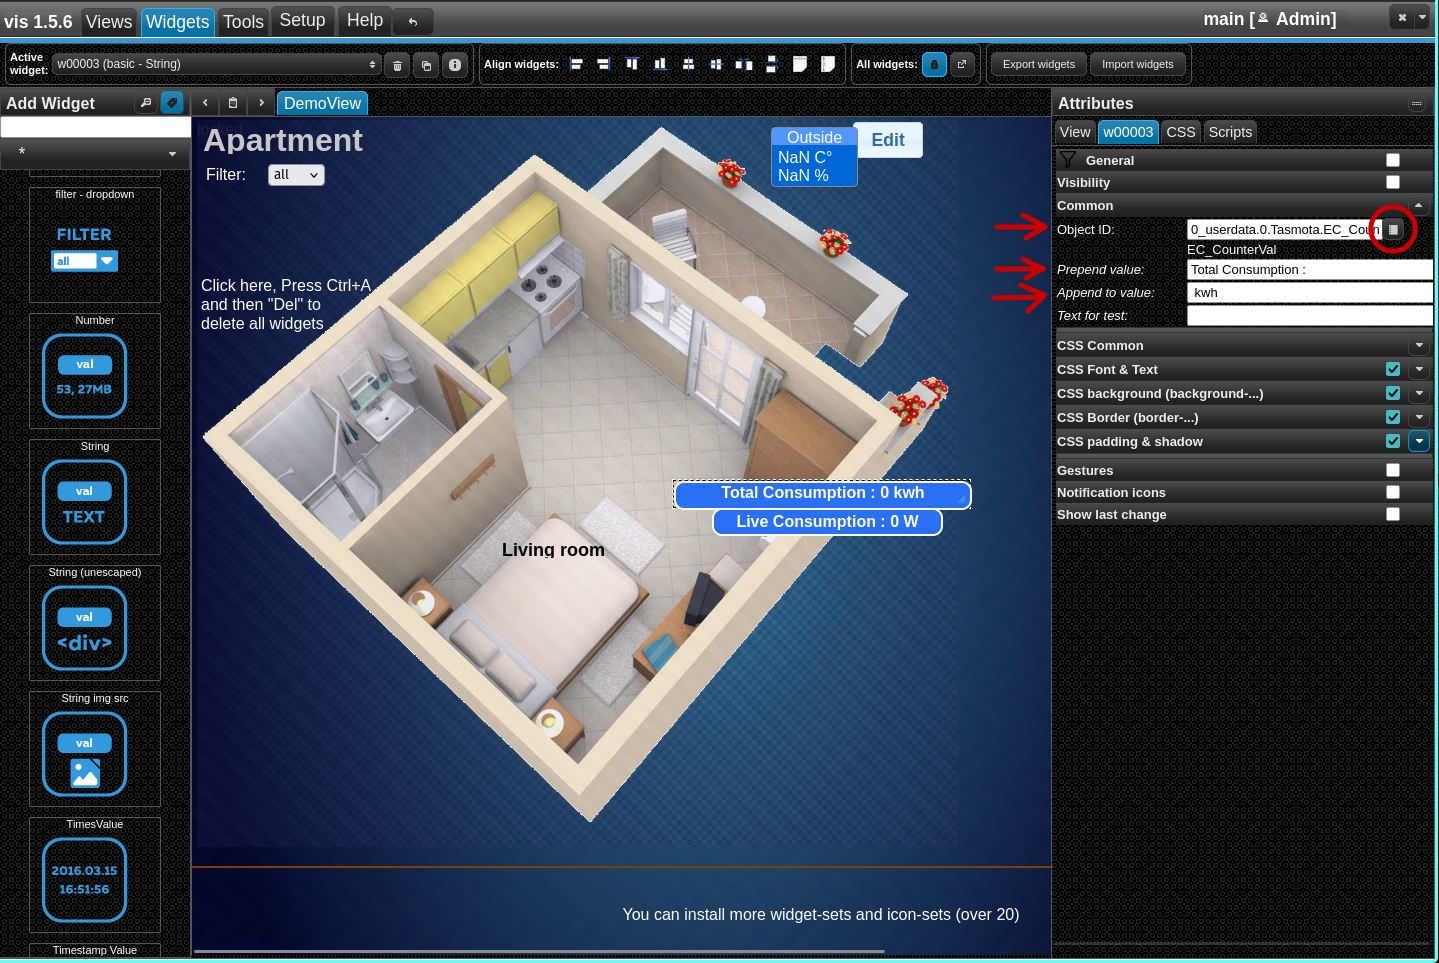
-
Add Text Widgets and use the following Object IDs:
0_userdata.0.Tasmota.<value_1>0_userdata.0.Tasmota.<value_2>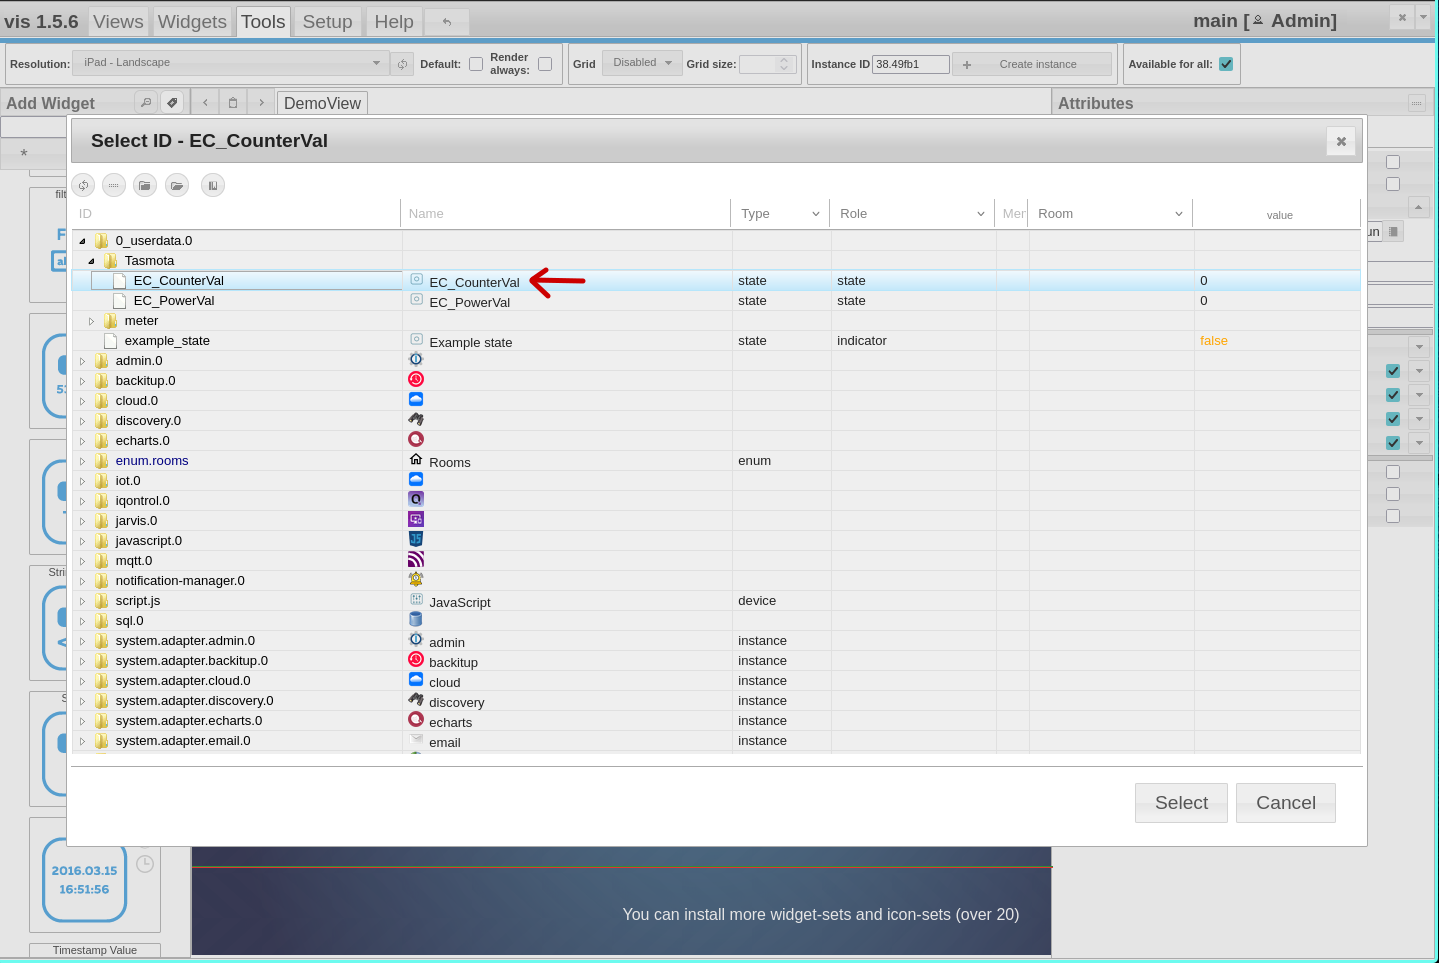
-
Adjust CSS, position, and append/prepend formatting as desired.
-
Similary can be done for other values too.
-
Click Close.
✅ Done!
Your Tasmota device is now integrated with ioBroker via MQTT.
You can now monitor real-time energy counter and power values etc directly in your browser.