Physical Installation
Installing your gasleser.pulse takes just a few minutes. You don't need any tools, and you never touch the gas installation itself.
Before You Start
- Do NOT turn off the gas supply — it stays on the whole time
- Never open, modify or unseal the gas meter
- You need a power socket within reach of the meter
- Use only the parts that came in the box
Make sure that:
- Your gas meter is compatible — see Compatible Meters
- The front panel of the meter is clean, dry and easy to reach
- Wi-Fi reaches the place where your meter sits
Step 1: Find the Right Spot
On the front panel of your gas meter, just below the label, there is a round recess. That's where the gasleser.pulse goes — it sits directly over the impulse disc inside.
The red frame in the picture marks it:
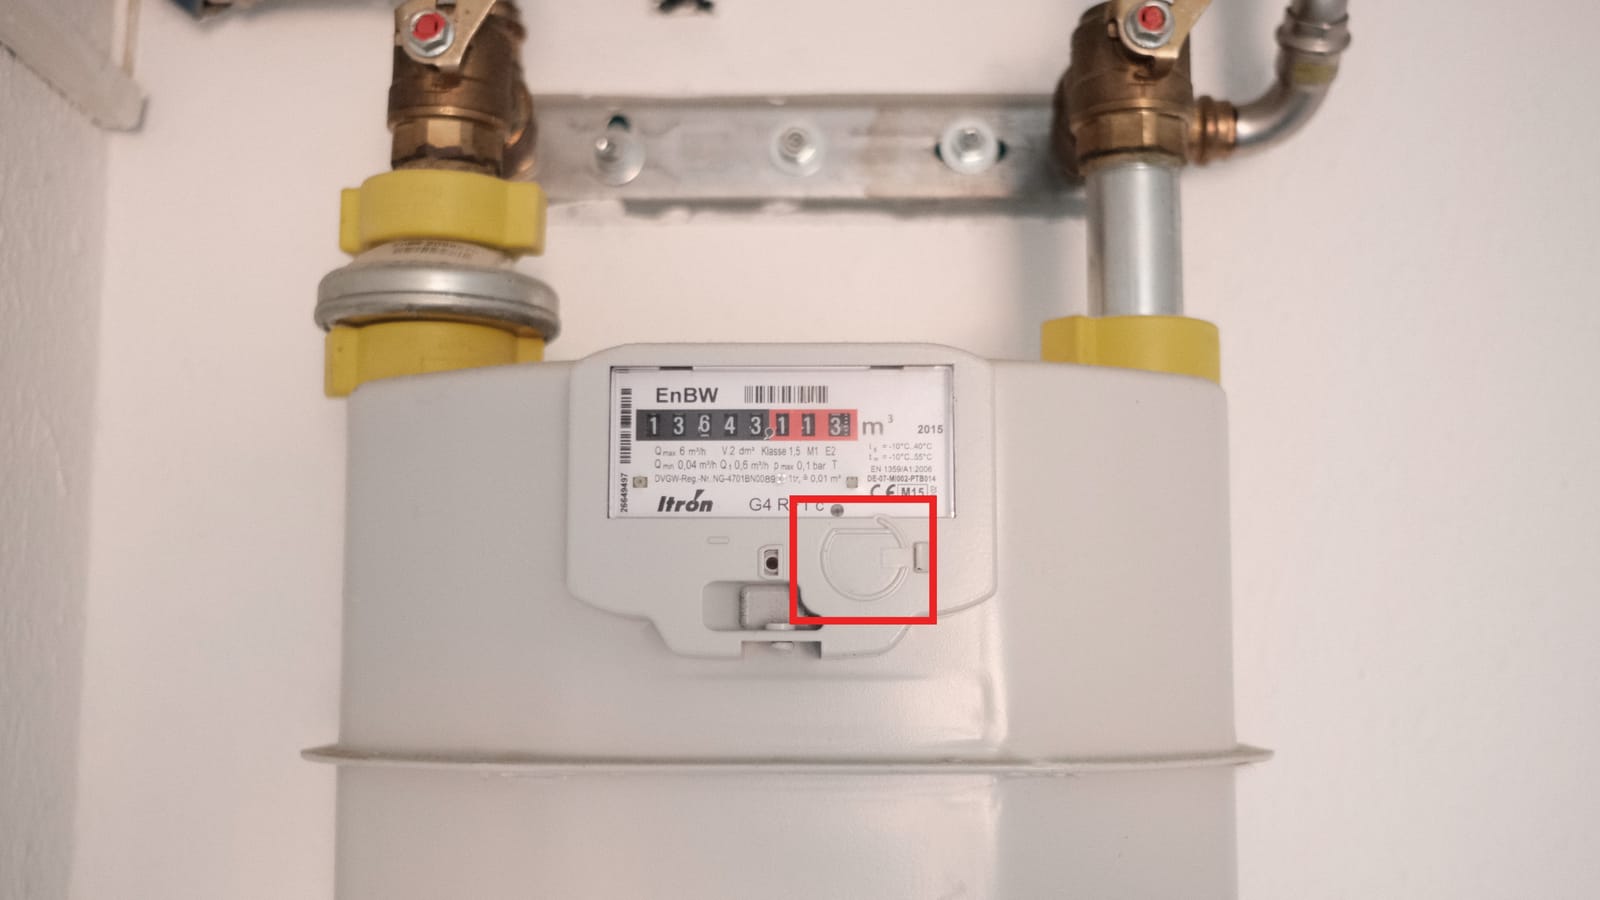
The recess is the round indentation to the right of the small optical interface. It's the only spot on the panel the device fits into.
Step 2: Clean the Surface
Wipe the recess and the area around it with a dry cloth. Dust or grease will keep the device from sitting flush and can cost you pulses.
Step 3: Attach the Metal Plate
A small metal plate comes in the box. It's what makes the gasleser.pulse hold magnetically in the recess.
- Take the metal plate out of the box
- Clip it onto the back of the gasleser.pulse until it audibly snaps in
- Check that it sits flat and centred — it must not stick out over the edge
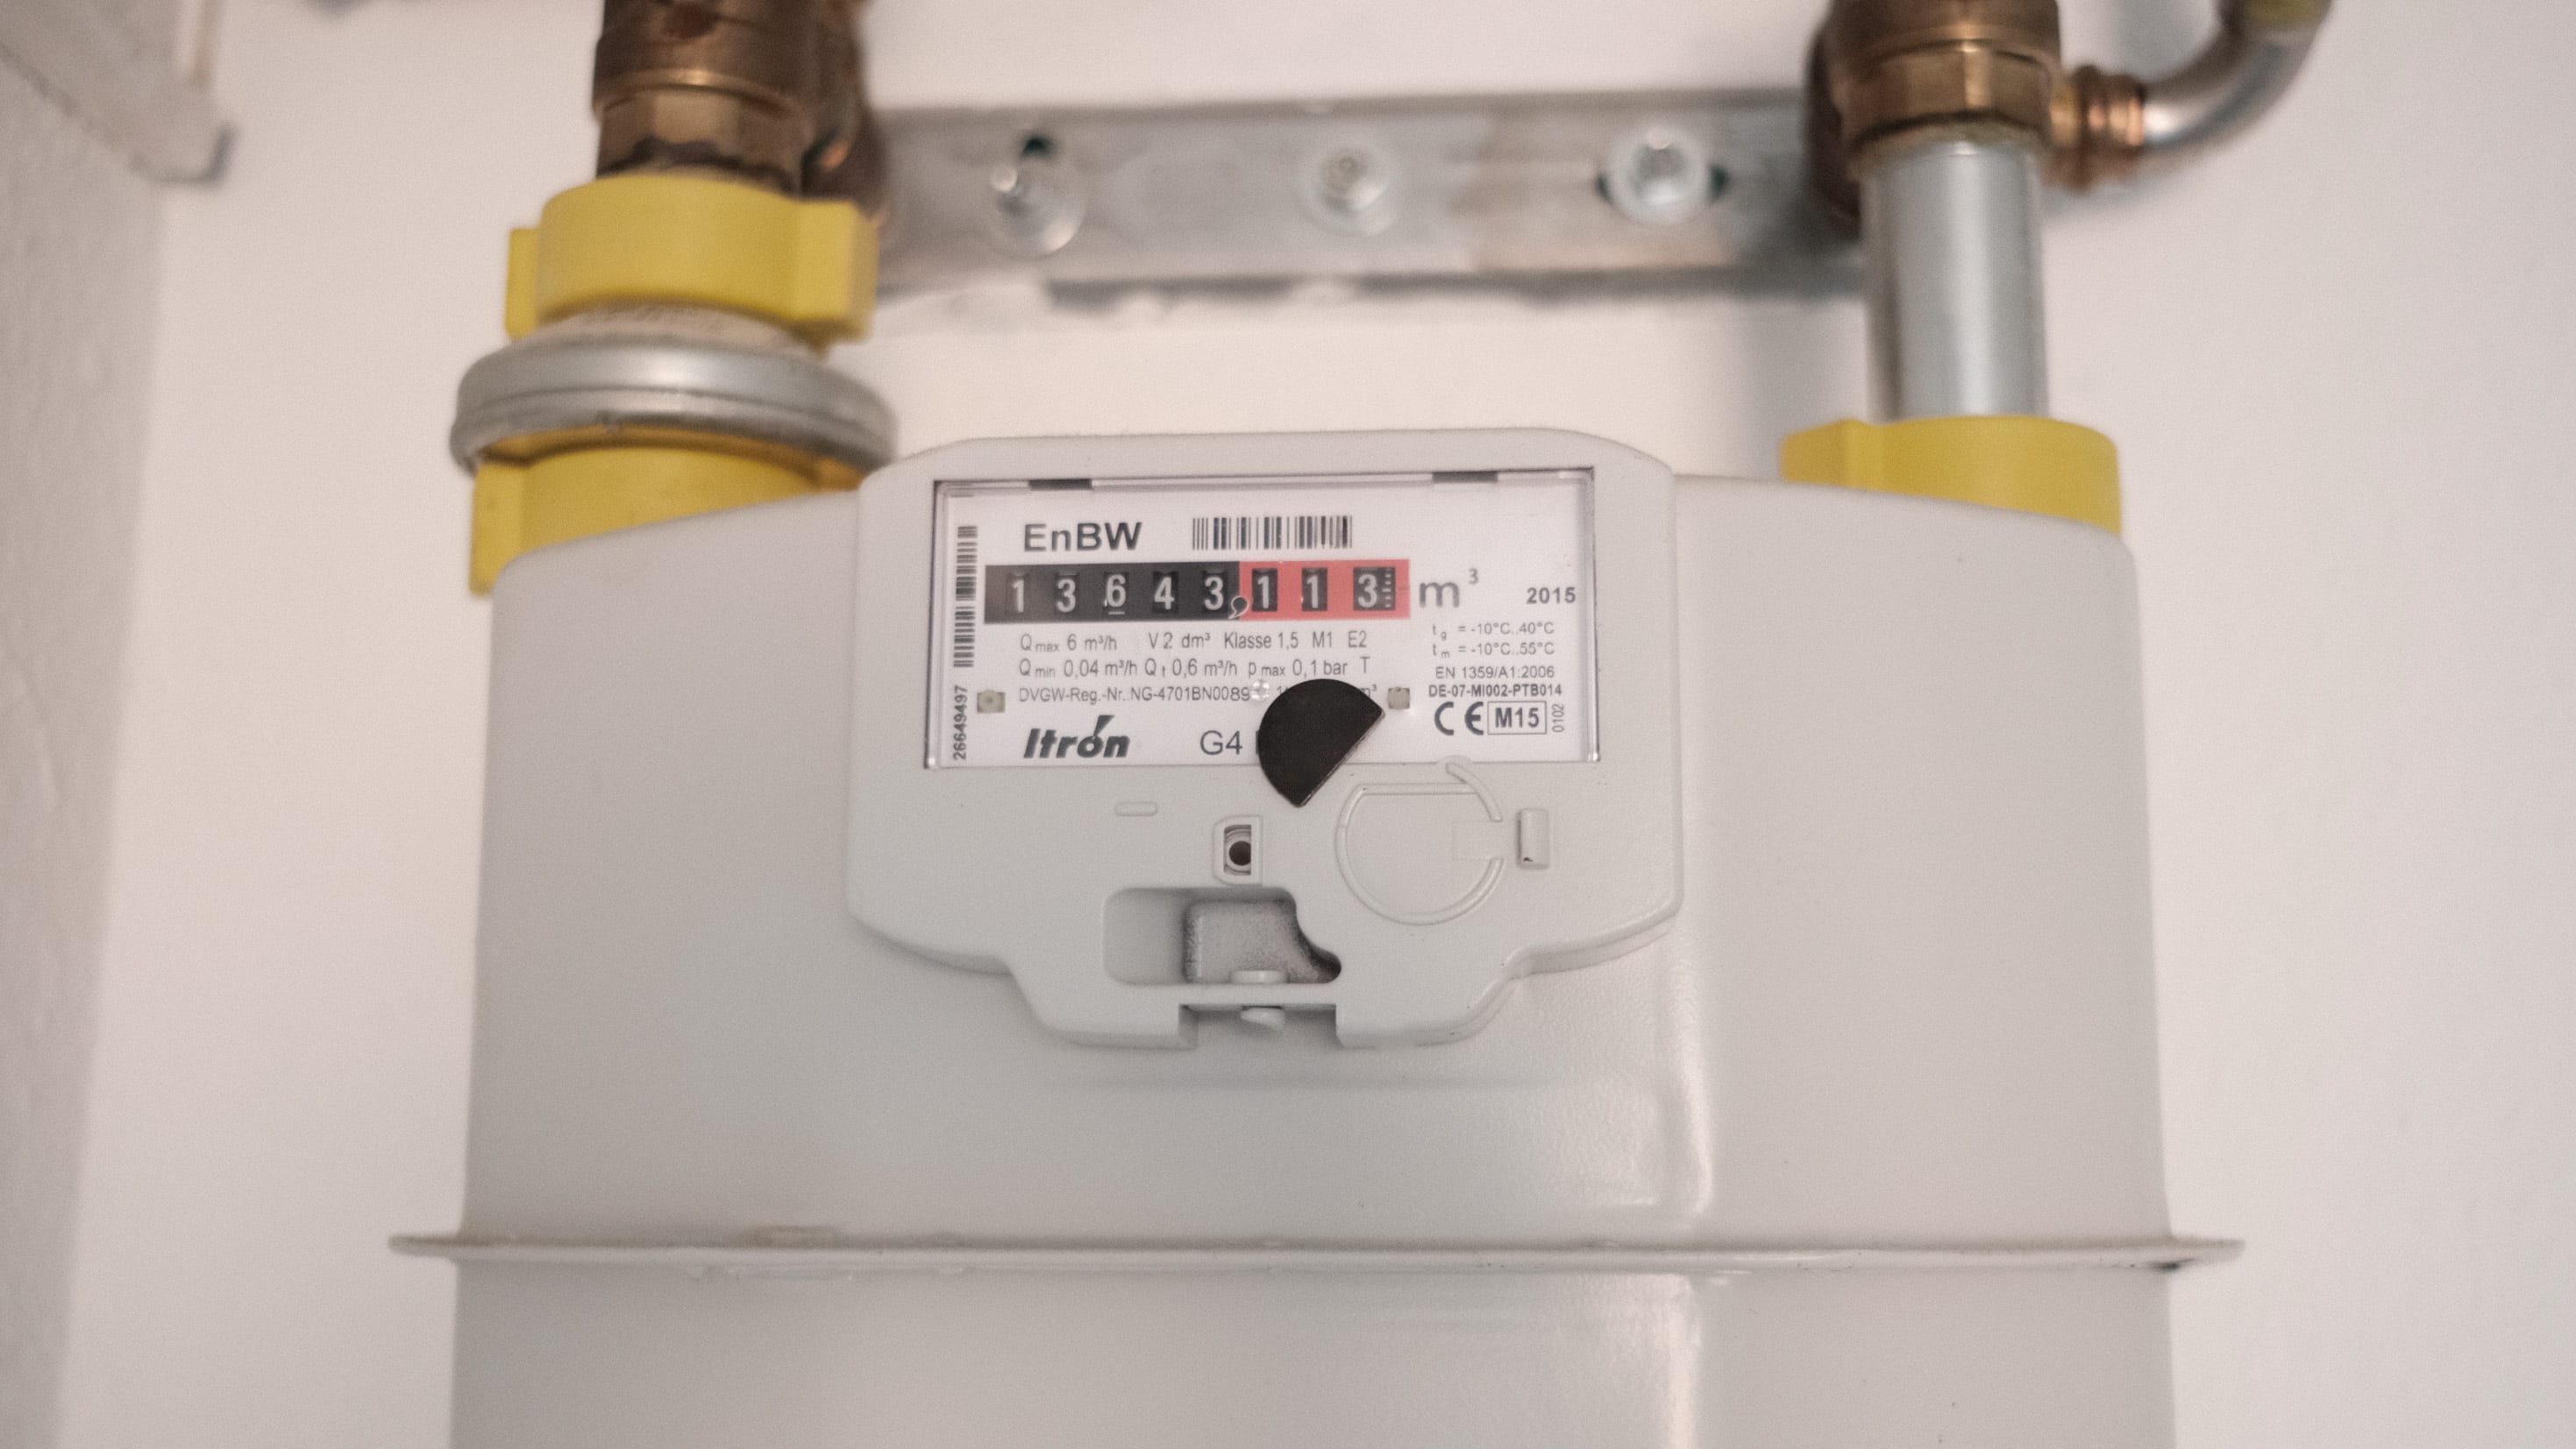
The gasleser.pulse only sits securely in the recess together with the metal plate, so don't skip this step.
Step 4: Attach the gasleser.pulse
- Place the device into the recess you found in Step 1
- Press it gently but firmly into place
The device should sit flat in the recess, like this — snug, not wobbling, and without covering the meter reading:
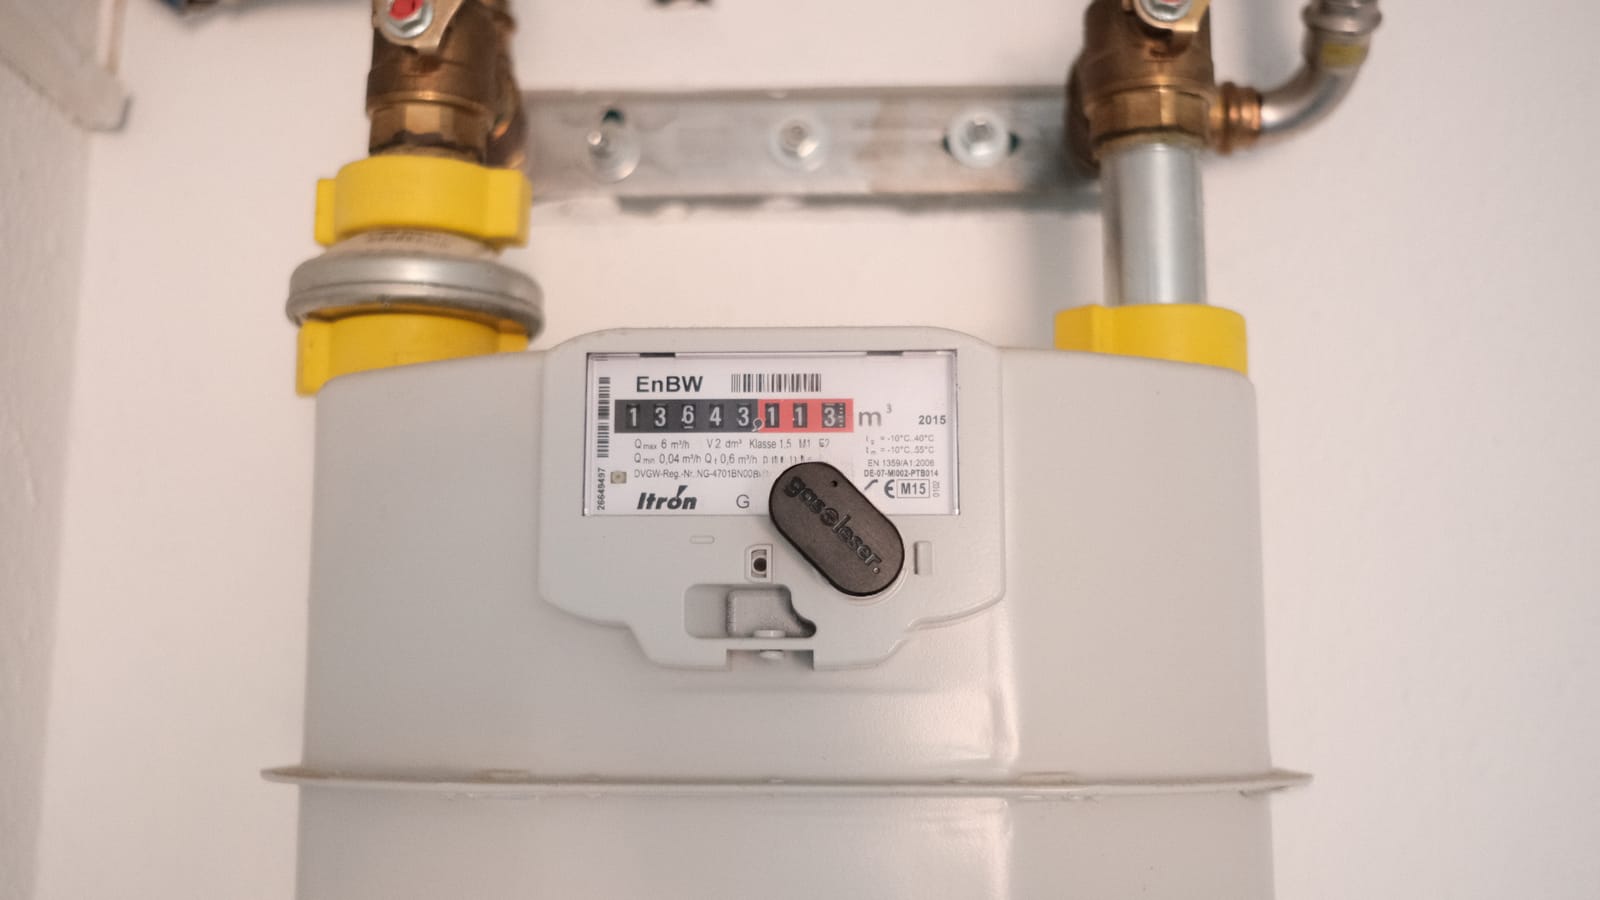
The sensor needs to sit right over the impulse disc, so the device belongs fully inside the recess — not next to it or half over the edge. This is the one thing worth taking a moment over: it's what makes your readings accurate.
Step 5: Plug In the USB-C Cable
Once the device sits securely in the recess, all that's left is power:
- Plug the USB-C cable of the included power adapter into the port on the gasleser.pulse
- Plug the power adapter into a socket near the meter
- Let the cable hang down loosely so nothing tugs at the device
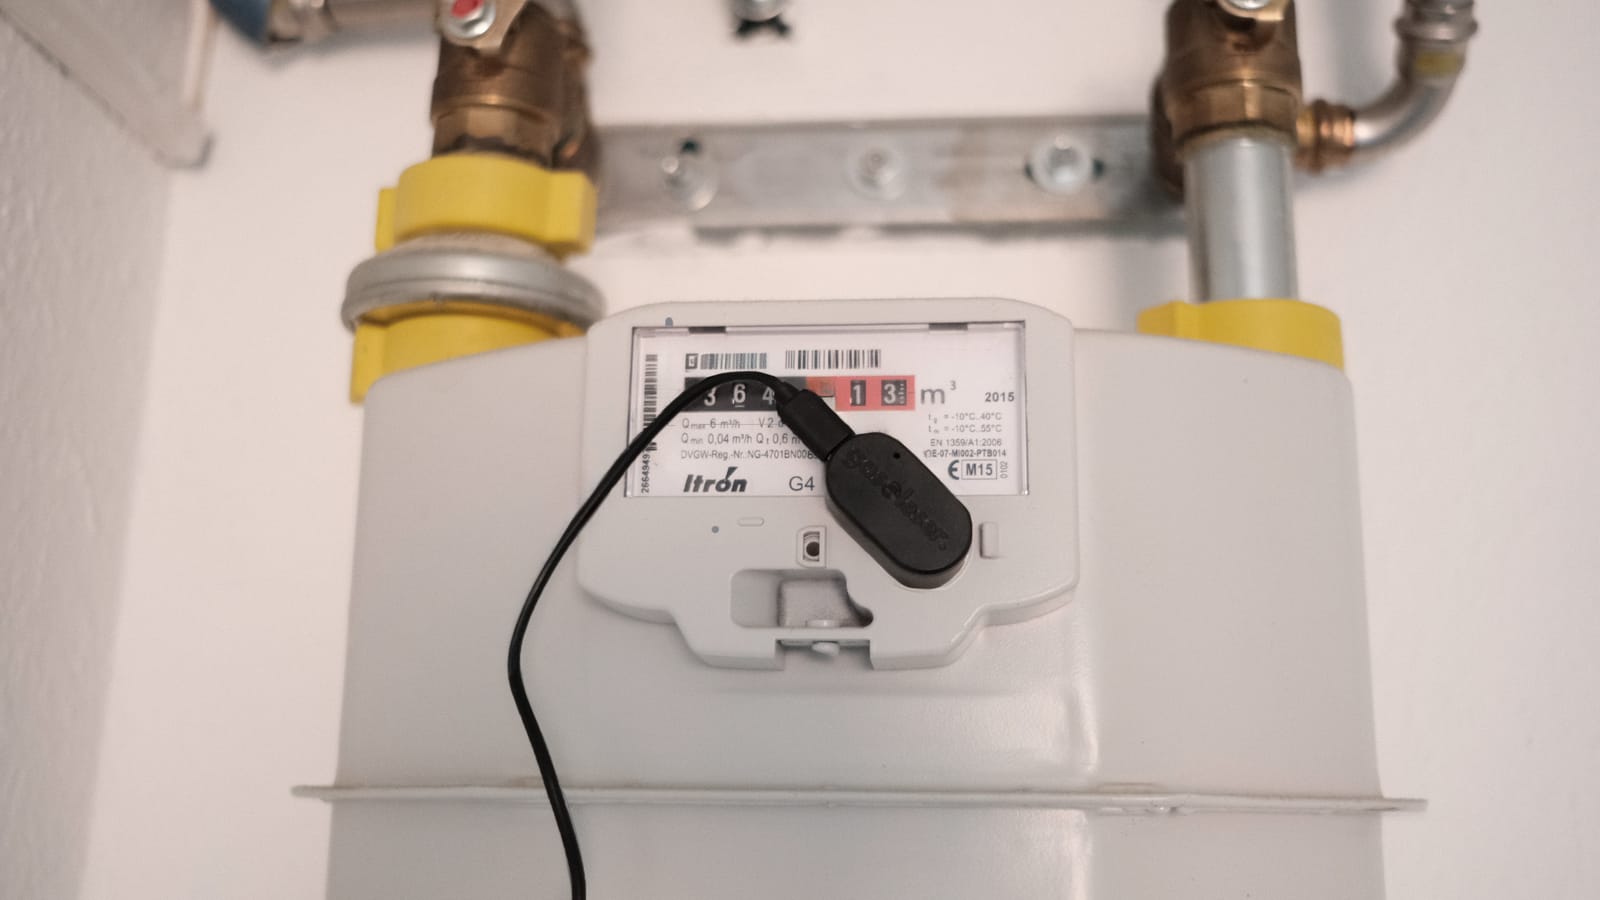
The full details are on the Power Connection page.
The gasleser.pulse needs power all the time. If you unplug it, the counter can reset and you'll have to enter your meter reading again in the app.
What If It Doesn't Sit Well?
- The device wobbles — take it off, check that nothing is trapped underneath, and place it again
- It won't stay put — clean the surface once more; any residue reduces grip
- No pulses at all — the sensor probably isn't centred over the impulse disc; shift it slightly and watch the LED again
Next Steps
That's the hardware done. Now:
- App Setup - Connect the gasleser.pulse to the app
- Configuration - Enter your tariff and meter reading