Setup: Disable the cloud connection
This guide walks you through disabling the cloud connection step by step, so your gasleser.pulse runs completely locally without any cloud connection.
Step 1: Open the web interface
-
Find the gasleser.pulse IP address
- You can find the IP address in your router (device list) or in the stromleser app under device settings.
-
Open the web interface in your browser
- In your browser, open
http://<gasleser-pulse-ip>/ - You should see the local settings page of the device.
- In your browser, open
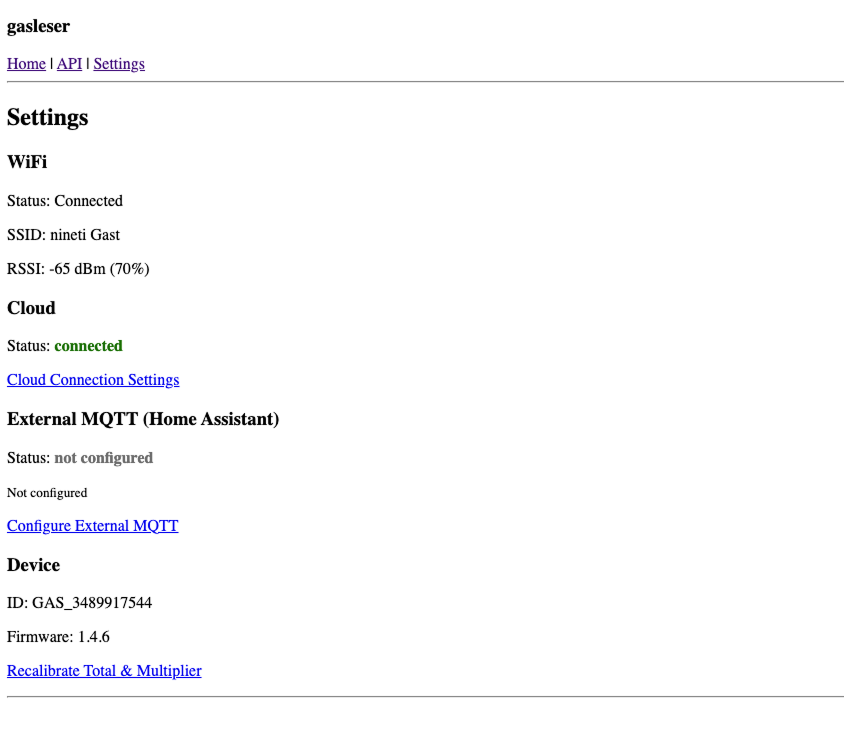
Step 2: Go to Settings
- Click Settings in the navigation.
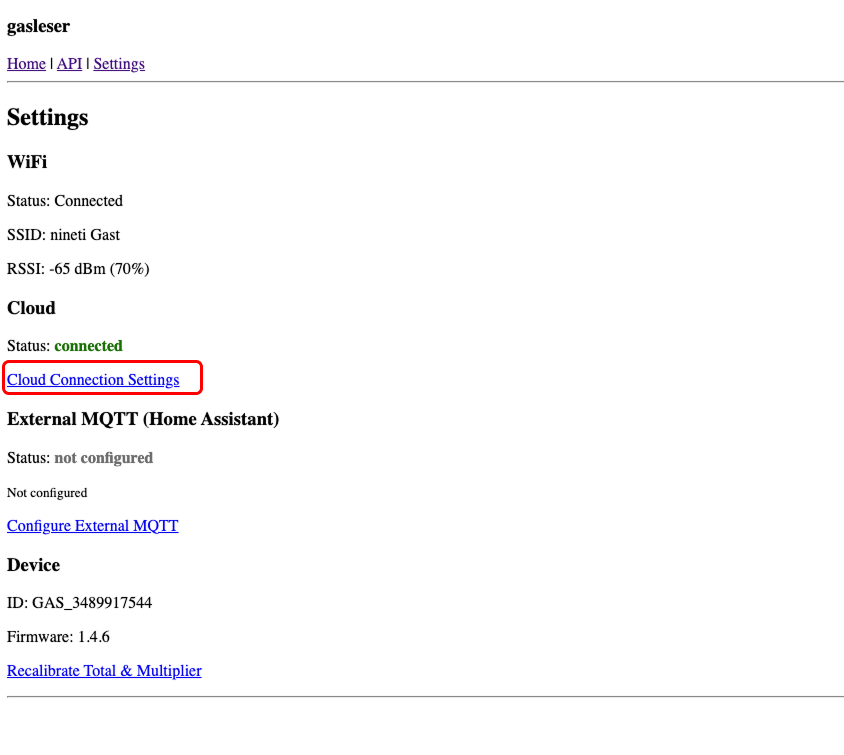
Step 3: Open Cloud Connection Settings
- In Settings you'll see the Cloud section with the current status (e.g.
connected). - Click Cloud Connection Settings.
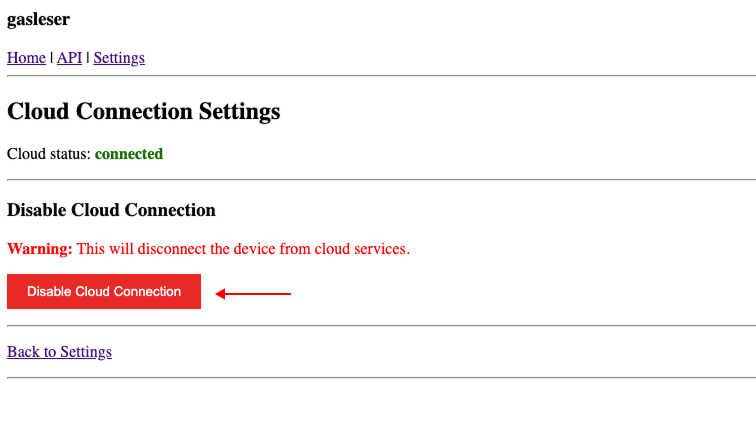
Step 4: Disable cloud connection
- Click Disable Cloud Connection.
- A warning dialog appears listing the effects:
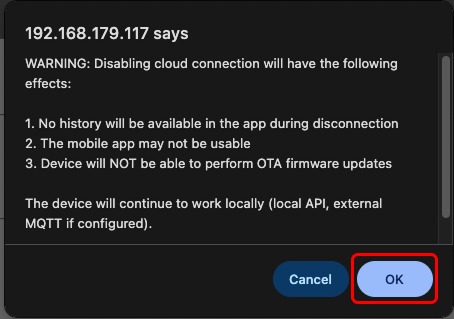
The effects in detail:
- No history will be available in the app during disconnection
- The mobile app may not be usable or only limited
- The device will NOT be able to perform OTA firmware updates
Important: The gasleser.pulse will continue to work locally (local API, external MQTT if configured).
- Confirm the dialog to disable the cloud connection.
Step 5: Check the status
After disabling, you'll see:
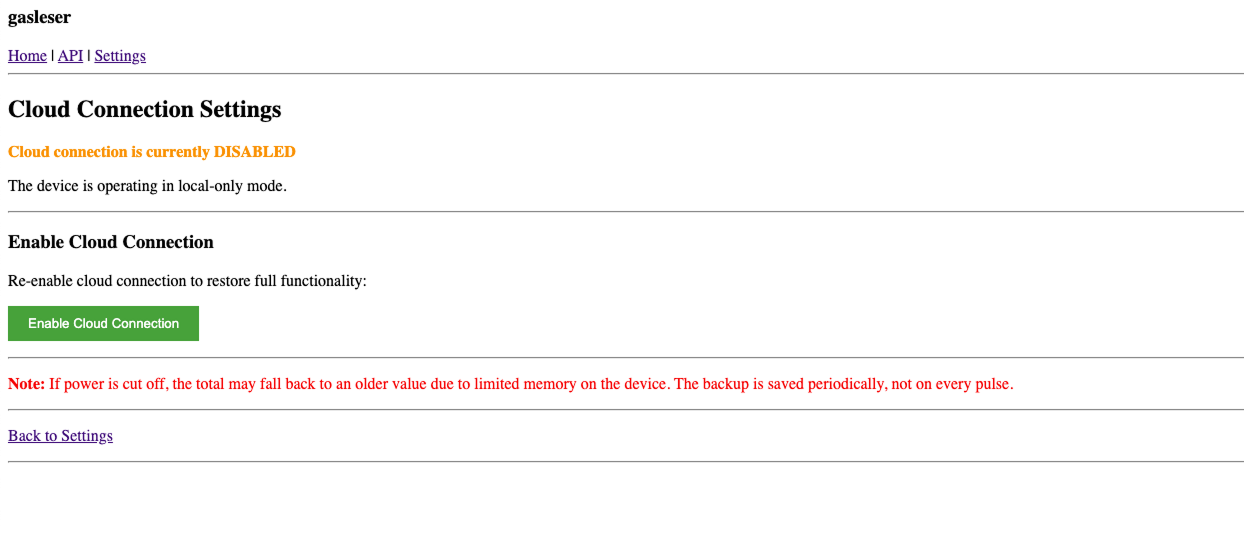
- In Cloud Connection Settings you now see that the cloud connection is disabled (for example: "Cloud connection is currently DISABLED").
- A button Enable Cloud Connection appears, which you can use to re-enable the cloud at any time.
Note: In the general Settings, the cloud status will now show as "not configured".
Next steps
After successfully disabling the cloud connection:
- Your gasleser.pulse now runs completely locally without cloud connection
- All readings continue to be sent via MQTT to Home Assistant (or your MQTT system)
- The local web interface and API remain fully available